导读
最近一直使用Nest.js和Next.js做项目开发,这两款都是非常优秀的开源框架,且对于主要从事前端开发工作的我来说,由于其都基于npm生态,使用起来也比其他语言容易得多。Nextjs其主要是一款全栈的SSR的框架,而Nest.js则是纯后端的框架。对于Next.js,官方告诉我们可以在/api路径下自定义常规的api接口,但是由于middleware仅仅支持Edge Runtime这一运行时,很多功能上比较受限,加之/api路径和文件即路由的开发范式只适合简单接口的开发,并不适合大多数情况的接口开发。因此,我会使用Nest.jsl来完成后端接口的开发。然而,新的问题又随之出现。如果分开项目开发,且都采用TypeScript以获得完善的类型提示,就会导致两侧都需要定义相同但又不同的ts定义,十分地麻烦。这时,笔者我想到,Nest.js和Next.js本质上都是一个node创建的服务器,不如将Next.js集成到Nest.js当中,让Nest.js提供给Next.js node服务器的能力,说干就干,让我开始尝试吧!
创建一个简单的nest服务。

引入next相关依赖和启动命令依赖库
1
2
3
| pnpm add next react react-dom
pnpm add cross-env ts-node-dev ts-node @types/react -D
pnpm add tailwindcss postcss autoprefixer -D
|
新建页面
新建两个页面后续使用
app/page.tsx
1
2
3
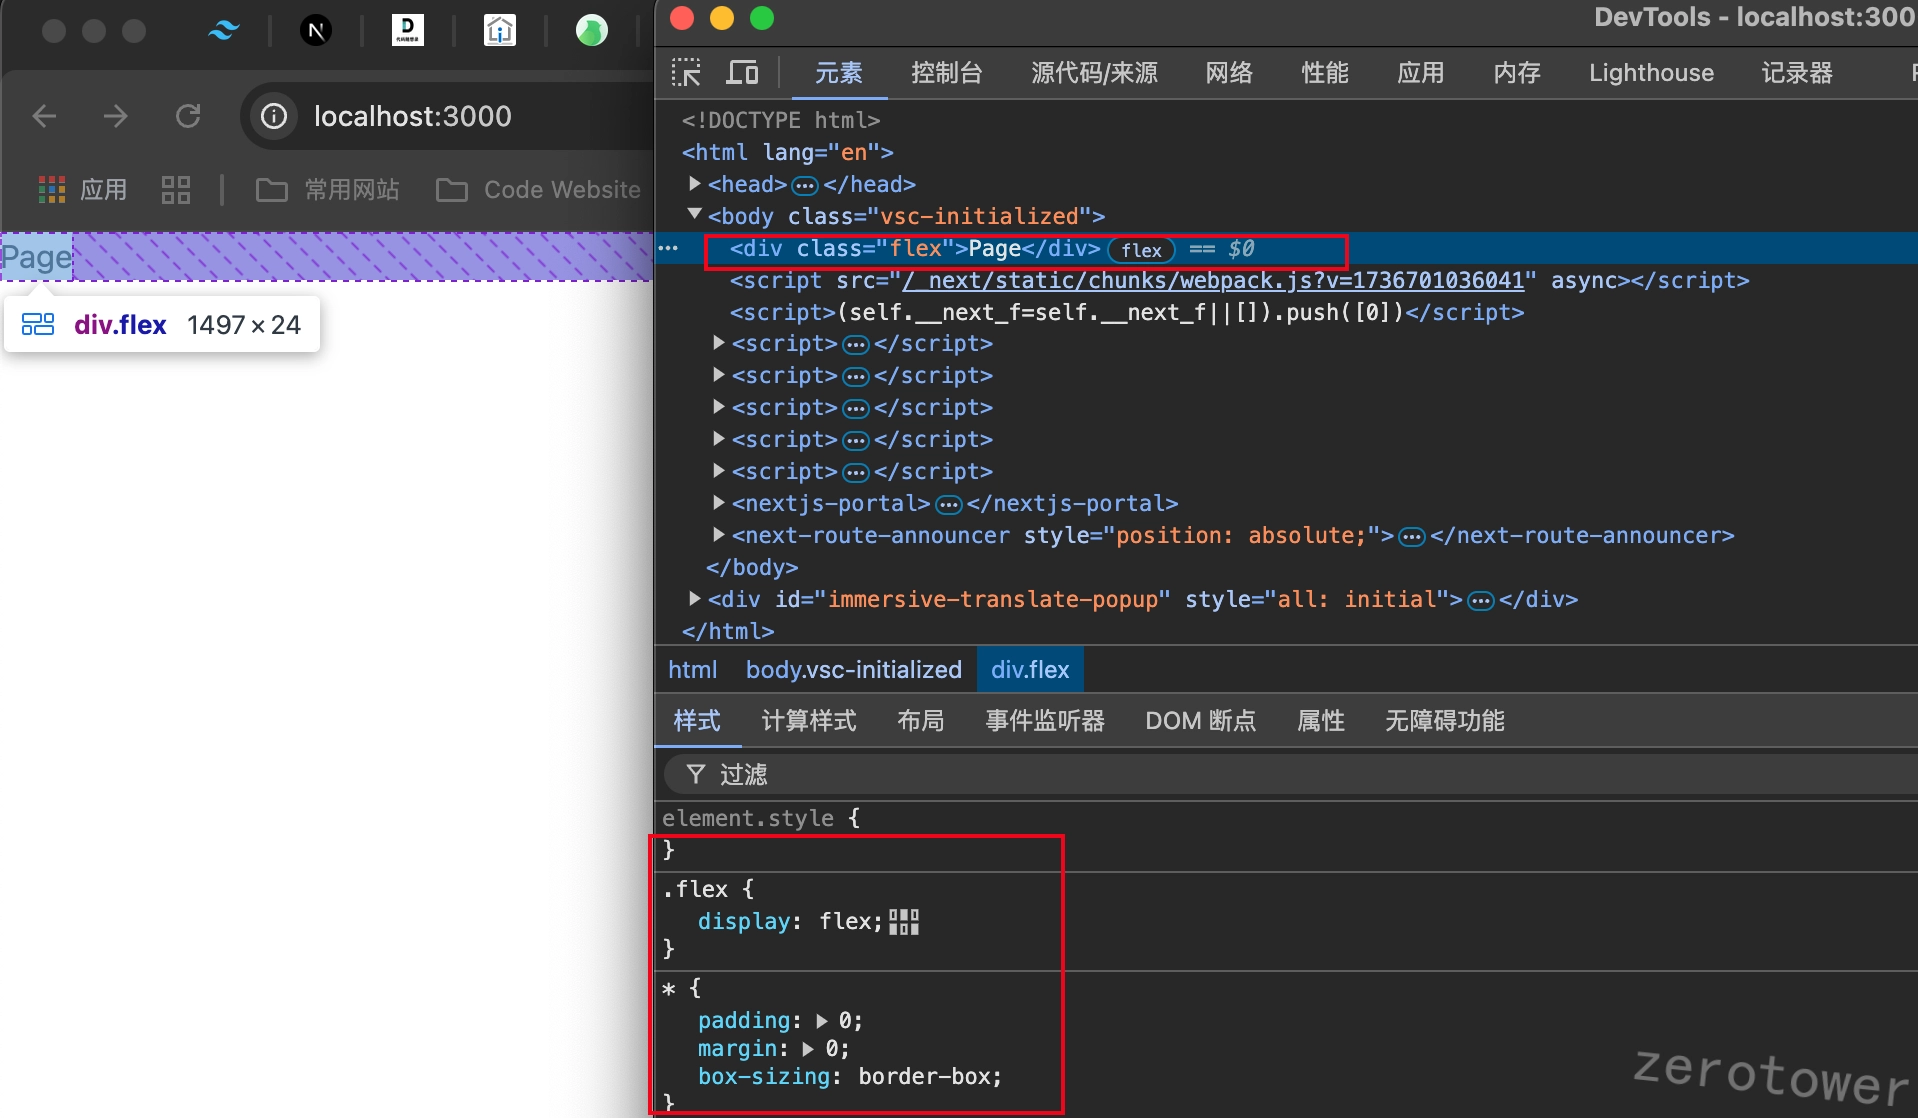
| export default function Page() {
return <div className="flex">Page</div>;
}
|
app/dashboard/page.tsx
1
2
3
| export default function Page() {
return <div>dashboard</div>;
}
|
分析如何使用nest启动
这里先查阅官方文档
在编辑器中查看具体的类型提示。app为NextServer,即创建是一个Next服务,其getRequestHandler方法返回一个handler句柄,可以用来处理原生node的请求和响应,参考node官方文档。
由此我们需要获取Nest的请求和响应对象,并按官方的示例传给上述提到的handler句柄。
由于nest基础版是默认使用express作为底层框架的,如果使用过express,其是有中间件概念的,通过app.use()加载中间件,其原理就是一个函数,接管处理了e xpress中的请求和响应对象,为此nest也会有中间件应许我们处理请求和响应对象。
参考nest的官方文档。

代码实现
可以实现自己的一个中间件NextMiddleware
1
2
3
4
5
6
7
8
9
10
11
12
13
14
15
16
17
18
| import { Injectable, NestMiddleware } from '@nestjs/common';
import { Request, Response, NextFunction } from 'express';
import { NextService } from './next.service';
import { parse } from 'url';
@Injectable()
export class NextMiddleware implements NestMiddleware {
constructor(private readonly nextService: NextService) {}
public async use(req: Request, res: Response, next: NextFunction) {
if (req.url.startsWith('/api/')) {
return next();
}
const app = this.nextService.getApp();
const parsedUrl = parse(req.url, true);
return app.getRequestHandler()(req, res, parsedUrl);
}
}
|
app即上文提到的NextServer,在整个项目中,我们需要的接口还是/api打头,为此如果请求路径以/api开始,继续由Nest处理(调用next函数),否则交给Next处理(handler句柄传入)。
上文提到的NextService类实现如下;
1
2
3
4
5
6
7
8
9
10
11
12
13
14
15
16
17
18
19
20
21
22
23
24
25
26
27
28
29
30
31
32
33
34
35
| import { Injectable } from '@nestjs/common';
import { NextServer } from 'next/dist/server/next';
import { Request, Response } from 'express';
@Injectable()
export class NextService {
private app: NextServer;
public getApp(): NextServer {
return this.app;
}
public setApp(app: NextServer): void {
this.app = app;
}
public render(
req: Request,
res: Response,
pathname: string,
query?: any,
): Promise<void> {
return this.app.render(req, res, pathname, query);
}
public renderError(
req: Request,
res: Response,
err: Error,
pathname: string,
query?: any,
): Promise<void> {
return this.app.renderError(err, req, res, pathname, query);
}
}
|
再创建一个NextModule供AppModule中调用
1
2
3
4
5
6
7
8
9
10
11
12
13
14
15
16
17
18
19
20
21
22
23
24
25
26
27
28
29
30
31
32
33
34
35
| import { Module } from '@nestjs/common';
import { NextService } from './next.service';
import { NextController } from './next.controller';
import next, { NextServer, NextServerOptions } from 'next/dist/server/next';
@Module({
controllers: [NextController],
providers: [NextService],
exports: [NextService],
})
export class NextModule {
constructor(private readonly next: NextService) {}
public async prepare(
options?: NextServerOptions & {
turbo?: boolean;
turbopack?: boolean;
},
) {
const app = next(
Object.assign(
{
dev: process.env.NODE_ENV !== 'production',
dir: process.cwd(),
},
options || {},
),
) as NextServer;
return app.prepare().then(() => {
this.next.setApp(app);
console.log('Next.js app prepared');
});
}
}
|
最终在app.module.ts中调用,并加载上述的NextMiddleware中间件。
1
2
3
4
5
6
7
8
9
10
11
12
13
14
15
16
17
| import { MiddlewareConsumer, Module, NestModule } from '@nestjs/common';
import { AppController } from './app.controller';
import { AppService } from './app.service';
import { NextModule } from './next/next.module';
import { NextMiddleware } from './next/next.middleware';
@Module({
imports: [NextModule],
controllers: [AppController],
providers: [AppService],
})
export class AppModule implements NestModule {
configure(consumer: MiddlewareConsumer) {
consumer.apply(NextMiddleware).forRoutes('/');
}
}
|
修改main.ts,确保相关中间件被加载后才启动服务
1
2
3
4
5
6
7
8
9
10
11
12
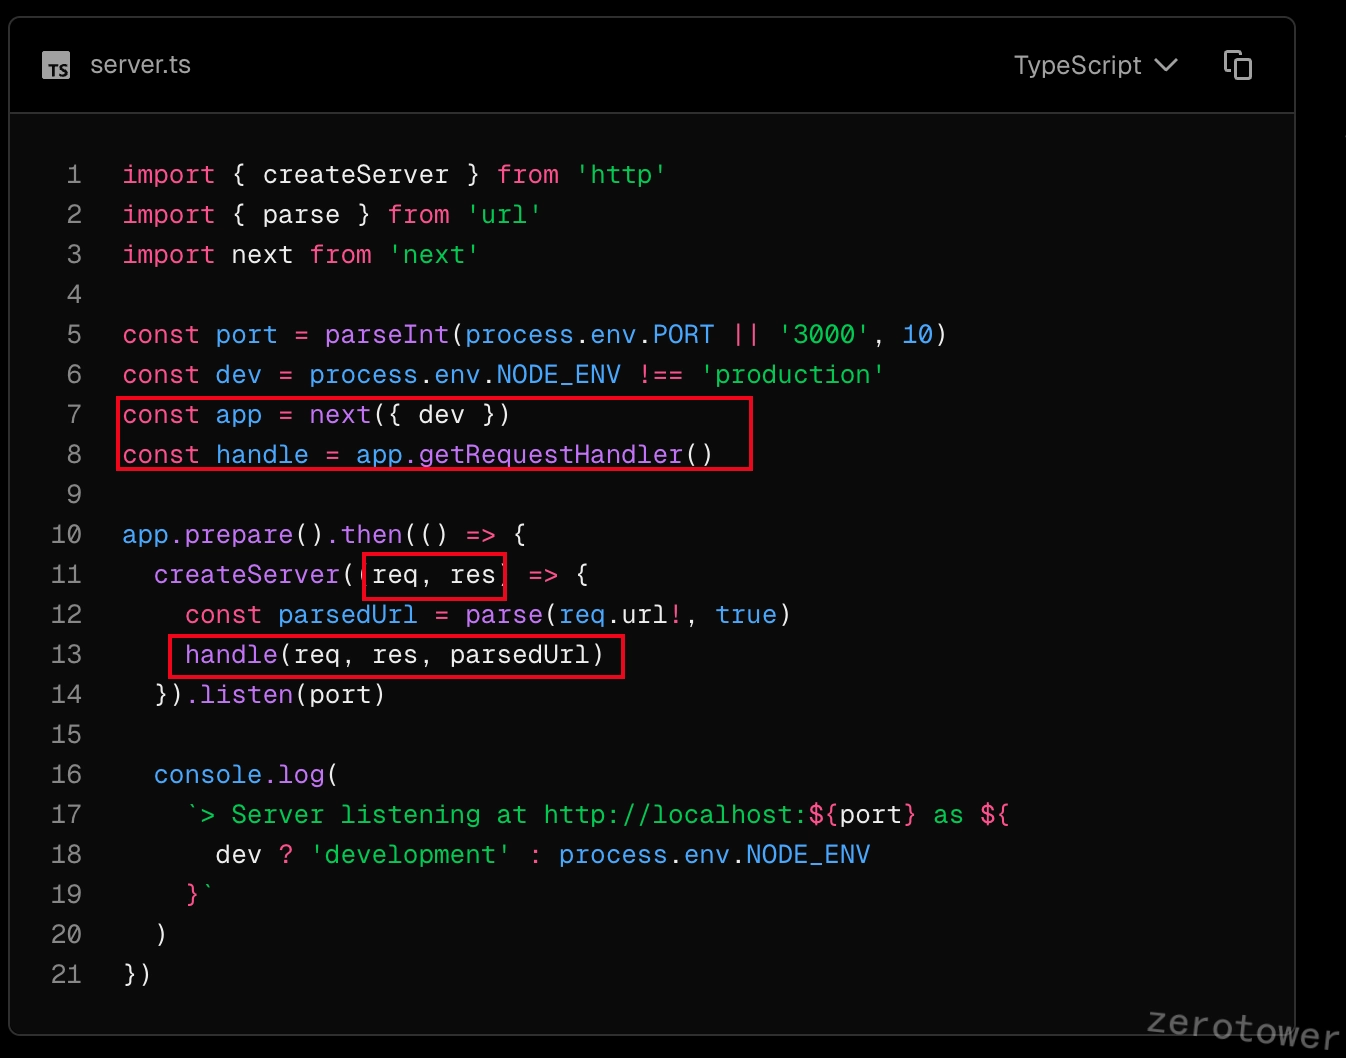
| import { NestFactory } from '@nestjs/core';
import { AppModule } from './app.module';
import { NextModule } from './next/next.module';
async function bootstrap() {
const app = await NestFactory.create(AppModule);
app
.get(NextModule)
.prepare()
.then(() => app.listen(process.env.PORT ?? 3000));
}
bootstrap();
|
此时的next已经实现了集成,但是原有的nest start无法启动next的,且next部分的编译方式和nest部分的编译方式有所区别。为此使用:
1
| cross-env tsnd --project tsconfig.server.json --ignore-watch .next --watch next.config.ts --cls src/main.ts
|
启动项目。
tsconfig.json
1
2
3
4
5
6
7
8
9
10
11
12
13
14
15
16
17
18
19
20
21
22
23
24
25
26
27
28
29
30
31
32
33
34
35
36
37
38
39
40
41
42
43
44
45
| {
"compilerOptions": {
"jsx": "preserve",
"module": "ESNext",
"target": "ESNext",
"lib": ["dom", "dom.iterable", "esnext"],
"moduleResolution": "node",
"declaration": true,
"removeComments": true,
"emitDecoratorMetadata": true,
"experimentalDecorators": true,
"allowSyntheticDefaultImports": true,
"sourceMap": true,
"outDir": "./dist",
"baseUrl": "./",
"incremental": true,
"skipLibCheck": true,
"strictNullChecks": false,
"noImplicitAny": false,
"strictBindCallApply": false,
"forceConsistentCasingInFileNames": false,
"noFallthroughCasesInSwitch": false,
"allowJs": true,
"strict": false,
"noEmit": true,
"esModuleInterop": true,
"resolveJsonModule": true,
"isolatedModules": true,
"plugins": [
{
"name": "next"
}
]
},
"include": [
"**/*.ts",
"**/*.tsx",
"next-env.d.ts",
".next/types/**/*.ts",
"postcss.config.ts",
"tailwind.config.ts"
],
"exclude": ["node_modules"]
}
|
tsconfig.server.json
1
2
3
4
5
6
7
8
9
10
11
12
| {
"extends": "./tsconfig.json",
"compilerOptions": {
"module": "commonjs",
"outDir": "dist",
"target": "es2017",
"isolatedModules": false,
"noEmit": false
},
"include": ["src/**/*.ts"],
"exclude": ["node_modules", "src/app","src/components", ".next"]
}
|
使用pnpm dev启动

解决tailwind无法使用的问题
此时,发现引入的tailwind.css没起作用,参考tailwind的官方文档。

我们需要项目启动前使用tailwindcss编译css文件。
为此新增一个dev:tailwindcss命令
1
| tailwindcss -i ./src/app/globals.css -o ./src/app/output.css --watch
|
安装concurrently用于同时执行多个命令dev:all
1
| pnpm add concurrently -D
|
1
| "concurrently \"npm run dev:tailwind\" \"npm run dev\""
|
运行pnpm dev:all后,浏览器显示